
Introduction#
In the previous article, I showed you how to physically install a hard disk in your computer. Now, in this article, I’ll guide you through the process of automounting the hard disk on your Linux system, making it accessible and ready to use with just a few simple commands.
Step 1: Switch to Root User#
Since the operations require root permissions, switch to the root user without using sudo:
su
Step 2: Create GPT Table and File System#
Linux requires a GPT table for disks. Use gdisk to create the GPT table and format the file system. First, identify your disk name with lsblk or blkid.
gdisk /dev/sda
o
y
n
enter
enter
enter
enter
p (ensure the file system is correct)
w
y
Step 3: Format the Disk and Choose File System Type#
I prefer Btrfs for my disk type. Type:
mkfs.btrfs /dev/sda1
If you encounter an error indicating existing data, use the -f option to overwrite the /dev/sda.
mkfs.btrfs -f /dev/sda1
Step 4: Create Your Mount Source Path#
Set a path for your files directory. Typically, mounting to the /mnt/* path is common.
mkdir /mnt/4tbhdd
Step 5: Mounting the Disk#
Mounting the disk can be done temporarily or set up for automount.
Temporarily#
For temporary mounting (until the system shutdown):
mount -t btrfs /dev/sda1 /mnt/4tbhdd/
Auto-mount#
- Identify your file system UUID using
blkid.
blkid /dev/sda1
- Copy the UUID value and use your preferred text editor to add the following line to
/etc/fstab:
❯ nvim /etc/fstab

UUID=<uuid-of-btrfs-file-system>   /mnt/4tbhdd   btrfs   defaults  0   2
Explanation of the fields:
UUID=<uuid-of-btrfs-file-system>: Replace the actual UUID of your Btrfs file system./mnt/4tbhdd: This is the mount point where the Btrfs file system will be mounted. Ensure that the mount point exists before attempting to mount.btrfs: Specifies the file system type. In this case, it’s Btrfs.defaults: This field includes default mount options. You can customize this field based on your specific needs, butdefaultstypically includes commonly used options.0: This field is used byfsckto determine the order in which filesystem checks are done at boot time. A value of0means that the file system is not checked.2: This field is used bydumpto determine the order in which filesystem backups are done at boot time. A value of2means that the file system is backed up.
After adding this entry to your /etc/fstab file, you can either reboot your system to apply the changes or manually mount the file system using the mount -a command.
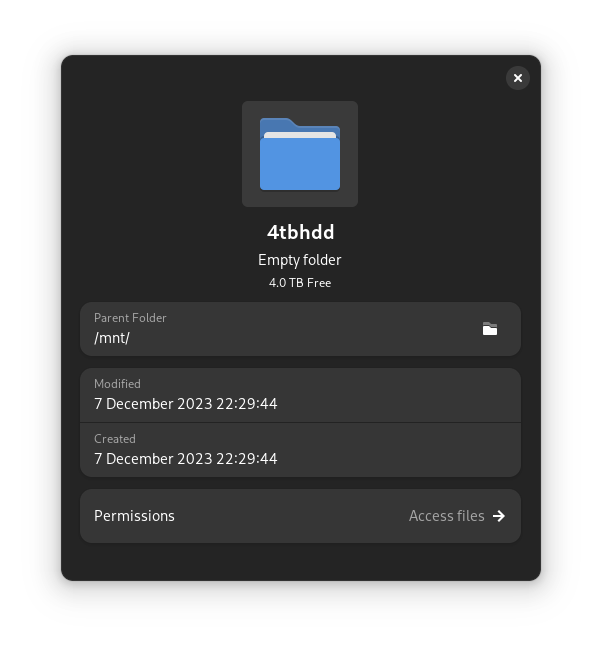
Verify the Mounting#
A Simple way, back to your directory /mnt/4tbhdd, and you should see your hard disk has been mounted. Right-click the directory and verify the free space (4.0 TB Free).
Step 6: Adjusting Permissions#
After successfully auto-mounting the disk, you might notice that the ownership is restricted to the root user. This means you cannot use a regular user to create directories or manipulate files on the mounted disk. To address this, use the chown command to set permissions, allowing your user and group to access all items:
sudo chown user:group /mnt/4tbhdd
Replace user and group with your actual username and group. This adjustment ensures that you, as a regular user, have the necessary permissions to interact with the mounted disk.
Conclusion#
Automounting your hard disk on Linux ensures convenient access to your storage space without manual intervention. This process allows you to seamlessly integrate additional storage capacity into your system.